Trampoline disassembly is inevitable. At some point, you will have to disassemble your trampoline or pay someone to do it. Some of the top situations that may force you to take down your trampoline include; proper storage during winter to increase its longevity, easy transportation when moving houses, or you decided to sell it. Whatever your reason is, what matters is that you do the disassembly properly. At first, it may seem complicated, but if you have some technical know-how, it won’t be as hard as it looks.
This article has all the hints and tips on how to disassemble a trampoline. Taking apart a trampoline is faster and easier than putting it together. However, the amount of time you take to disassemble the trampoline will depend on its type, size, and the tools you use to take it down. Read on for quick hacks that can cut down on the disassembly time significantly.
It is necessary to disassemble your trampoline when moving houses or relocating it. Moving the trampoline from one point to another will be much easier, cheaper, and safer if it is reduced to smaller parts.
Disassembling a trampoline is not only necessary when you are moving houses or revamping your backyard. If you live in an area with harsh weather like heavy snow and extreme summer heat, you may need to take down your trampoline and store it safely to increase its lifespan. On the other hand, if you live in a tropical region or an area with a year-round mild climate, you can leave your trampoline outside, provided you do some basic care and maintenance to increase its lifespan.
The extreme cold and dampness that comes with storms and hurricanes pose a threat to the trampoline’s build quality. Its frame and springs may form rust that could reduce its longevity significantly. The warm summer and snow are equally capable of compromising the trampoline’s quality.
To avoid any damage caused by adverse weather conditions, it is better to disassemble your trampoline and store it properly during winter.
As complicated as trampoline disassembly sounds, you don’t really need elaborate tools for the task. It is highly likely that you already have the tools you need from your toolbox. Plus, some of the tools that come with the trampoline for installation can also come in handy during disassembly.
Some of the tools you will need include;
A brand new trampoline comes with a complete assembly tool kit in its package. The tool kit usually includes;
The tools will help you set up the trampoline as well as take it down. If your trampoline is a hand-me-down or second-hand bought, you may not have the tools. If that’s the case, you can buy the tools separately or make a trampoline spring tool yourself. If you are in the market for a trampoline but have no idea where or what to look for, read our articles about the best trampoline, best rectangular trampoline, and best trampoline for gymnastics to get unmatched value.
Disassembling a trampoline is a step-by-step process that can take you up to an hour. Before you start the process, plan yourself well. Here is how to dismantle a trampoline;
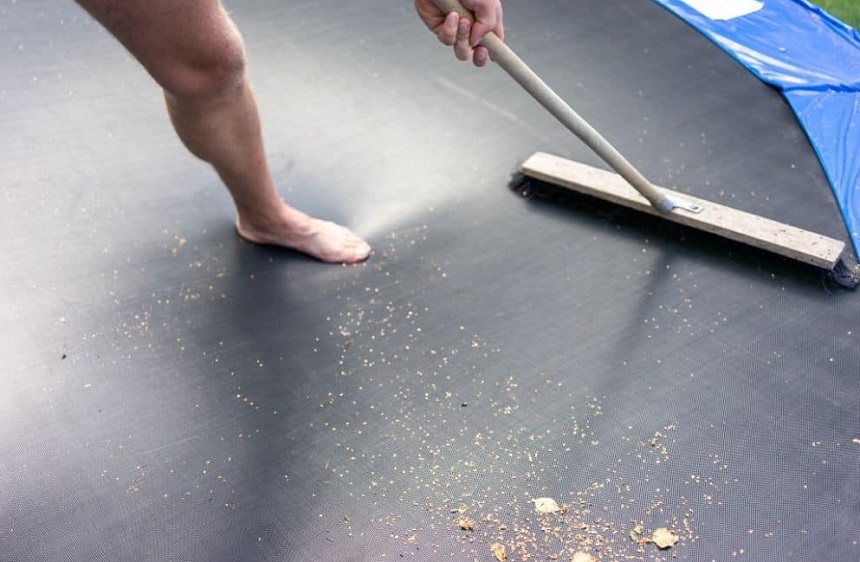
Dirt can slow you down when taking down a trampoline. Use a washcloth and clean water to remove the dust and debris from its surface before dismantling it.
The procedure for removing nets is similar for nearly all types of trampolines. Begin by removing all the components blocking your access to the nets like a tent or clubhouse. Most trampolines’ safety nets have poles. Therefore, you must separate the nets from the poles. Detach the poles if they are inside the trampoline’s frame. Use a power drill or screwdriver to unscrew the poles.
Safety padding is what makes the trampoline safe to jump on. According to an article by Washington Post Trusted Source Trampolines make you want to jump, but may not be safe - The Washington Post Jumping on a trampoline may seem like a great way to exercise and have fun, but a new report from a group of pediatricians (kids’ doctors) warns that it may not be safe. www.washingtonpost.com , Pediatricians warn that trampolines are fun but may be unsafe for your kids. Taking off safety padding is child’s play as most of them are usually just tied on. Safety paddings usually have knots under the trampoline. The knots can be challenging to loosen with bare hands. If that’s the case, try using a screwdriver.
This is the most challenging bit of the entire trampoline disassembly process. You need the spring puller and some strength to hack this stage. First off, check the trampoline springs’ condition. You cannot remove a broken or worn spring the same way you can remove one in good shape. If the springs are rusty, you will need a different approach.
To remove the springs in good condition;
After removing all the springs successfully, you will only have the mat, and the trampoline frame left. Fold the mat and store it well in a neat dry place.
According to insportline’s Trusted Source Trampoline User Manual Before you begin to use this trampoline, you must read all the information in this manual. www.insportline.eu trampoline user manual, disassembling a trampoline frame is basically a reverse of the assembly process. The entire process requires a lot of unscrewing, for which you will need a screwdriver. A power drill would be faster and more convenient. For added convenience, get a can of WD-40 or any other greasing agent in case you have some rusty screws.
When done with unscrewing, remove all the legs from the trampoline’s outer ring. Watch out for the heavy legs as they can be hazardous if they fall on your legs. Just like you did with the springs, work your way around the trampoline to ensure you have evenly distributed weight when detaching the legs.
Next, remove the outer rings by twisting them to separate them from the T-joints.
The video below shows how to take down a round trampoline.
Before you start disassembling your trampoline, get appropriate containers for storing all its small crucial components, including springs, screws, and nets. This will make reassembly much easier for you.
You can remove the trampoline’s springs even if you don’t have a spring tool. All you have to do is remove one spring or use an extra if you have one. Using the spring as the tool, insert one of its hooks into the spring’s hook that is still attached to the frame.
When moving, you don’t have to disassemble all the trampoline’s components if it is not going to be in contact with heavy objects. You can keep some of its parts partially assembled like U-shaped leg sections on the frame or poles on the safety net. Just ensure that the partially assembled parts are not stressed in any way as they need to be in top shape for reassembly.
When taking down a rusty trampoline, ensure you have gloves on at all times. Remove the safety pads, then focus on removing the springs. If the springs are also rusty, pick the first to remove, then remove the one on its exact opposite side. Repeat the pattern until there are no springs left. Be extra careful when taking down the frame. Unscrewing the rusty parts may be challenging.
If the frame proves to be a challenge to take down during disassembly, use some WD40 or penetrating oil to ease the process. Here is an article by WD-40 Trusted Source Removing Rust Chances are you have encountered rust at some point in your career. Tired of rust? The best way to prevent rust is to learn what causes it and how to prevent it even before it starts. www.wd40.com on how to remove rust. Apply the oil and let it sit for at least 10 minutes. Unscrew the top screws on the frame, then pull up the ring to take down the stands. At this point, the trampoline’s legs should come right off. If they don’t, spin them, and they will easily come off the ring.
As mentioned before, the amount of time it takes to disassemble a trampoline is dependent on various factors, including the trampoline’s size, type, and the tools you are using. Disassembling trampolines with more springs takes longer. You are likely to spend between two and four hours dismantling your trampoline. For a spring-free trampoline, you’d be done in less than two hours. Read this post by Springfree Trampoline Trusted Source Springfree Trampolines: Our favourite facts! As a Fun Consultant at Springfree I get asked so many questions about our amazing trampolines, from deciding which one is best for your garden to how Springfree Trampolines were invented, so we decided to put all of our favourites in one place! www.springfreetrampoline.co.uk for more information about spring-free trampolines.
Since trampoline disassembly is basically the assembly process in reverse, the cost would pretty much be the same. The cost varies according to the size of the trampoline. A trampoline handyman can charge you anything from as low as $100 to a maximum of $2500. A small spring-free trampoline is easier to dismantle and thus cheaper compared to a large trampoline with multiple springs.
After disassembling your trampoline successfully, you have to store its parts properly to preserve its longevity. None of the parts should be left out in extreme weather conditions unless they are all rust-resistant and are well-covered.
The first step in proper trampoline storage is getting appropriate containers for storing all the small parts like nets, springs, and screws. This will help you have a more organized reassembly process.
As for the large parts, tape them together. Taping will keep the main parts together for an organized reassembly as well as easier movement. Ensure no other objects or items are resting on the trampoline parts. Keep them in a safe space with no risks of getting damaged by other large objects in the vicinity.
Wrap or enclose all the soft trampoline parts like pads, nets, and tents to prevent insects and other animals from chewing or nesting in them.
If you have a large space indoors, you can store your trampoline without disassembling it. If you prefer to store it indoors without taking it down, ensure you keep it in a horizontal position to maintain its equilibrium.
Taking down a trampoline is no child’s play, but it isn’t as hard as most people imagine. We have provided a clear guideline on how to disassemble a trampoline. If you do everything in the logical order according to the guide and use all the hacks we have provided, you will have your trampoline down in no time. The only challenging part of the entire process is spring removal, but with the right tools, anyone can hack it.
If you have large interior space, then you can skip the hassle of disassembling your trampoline for storage during summer and winter. If that’s not the case, you have no choice. Also, ensure you take the trampoline apart when moving in long distances.